7.27.2008

Slowly but Surely.....

Guess who came out of its gallon size ziploc bag?


Giselle!
I started this top back in April! And I am just now working on it again. I lost interest for awhile there but the guilt of knowing it's sitting there unfinished drove me into a Giselle-knitting frenzy. So I pulled it out and started working on it again.
I've decided to forgo the long sleeves and leave it cap sleeved the way it is. It will be a better summer top that way and less knitting for me, yay!
To tell the honest truth, I'm not really enjoying this project but I am looking forward to wearing it.
So I must press on.

7.24.2008

Rejection

Well... back in May I designed what I thought was a beautiful sock. I submitted it to Knitty.com, and well.... I think you can figure out what happens next....

This is the third time this year that I have had a pattern rejected and frankly I'm starting to think that I should just stick to knitting other peoples patterns than trying to come up with my own.

It is such a pretty sock, I was sure that this was "the one" that was going to make it.

Ahhh.. well....

Amelie


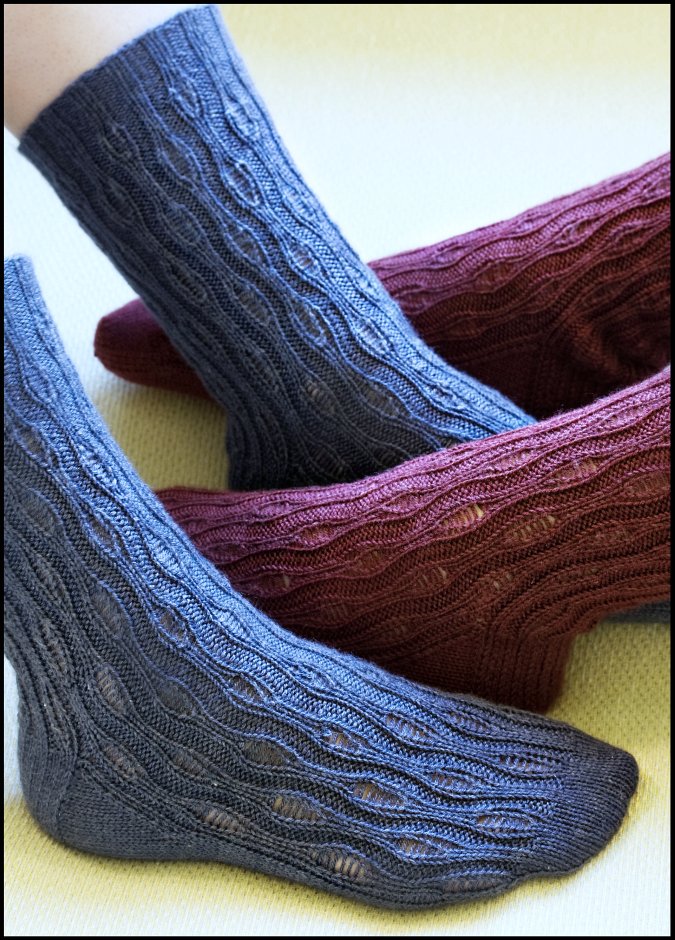
Introducing my new sock pattern... Amelie.

Amelie Framed

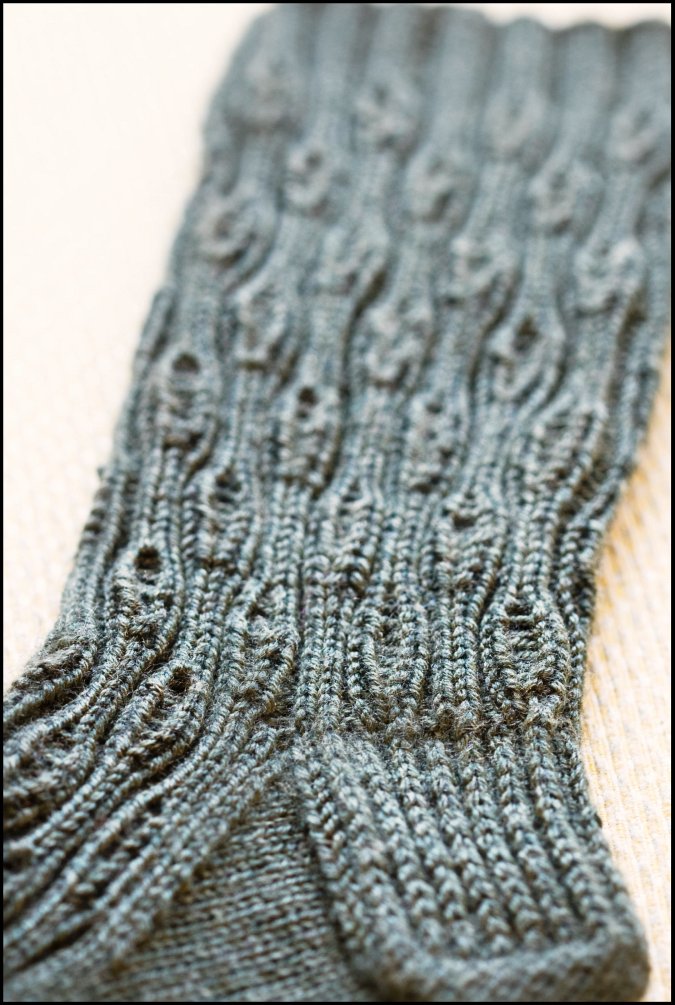
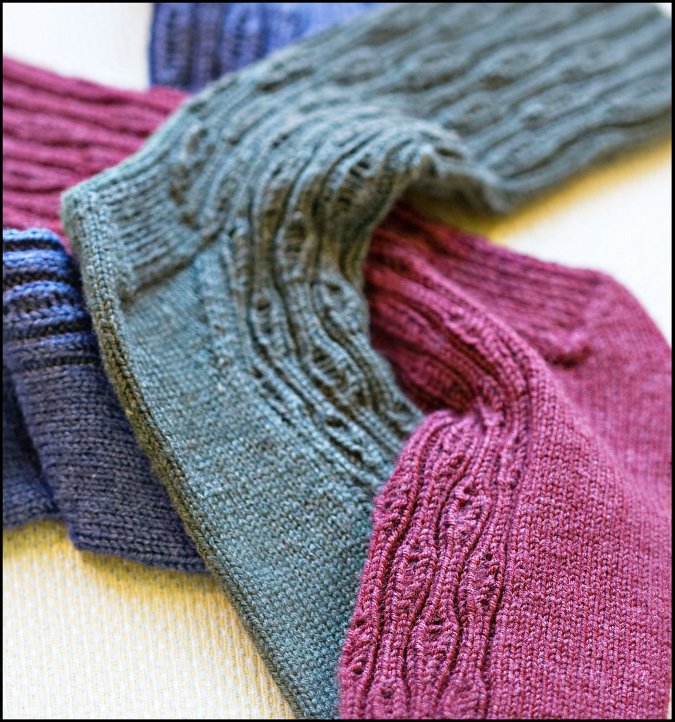
Amelie is a fun, easy to memorize sock pattern that you’ll be sure to enjoy knitting. The ribbed yet lacy stitch creates a nice stretchy fabric that clings nicely to your leg. The lace look is created by simply dropping stitches, which all of us knitters have a little experience with. The pattern is sophisticated and can be dressed up or down depending on which yarn you choose to knit them with.

Single Green BIG framed

The awesome thing about this pattern is that it has been written to accommodate three different methods of sock knitting. You can knit up your Amelie socks using double pointed needles, 2 circular needles, or one circular needle (magic loop). This pattern offers a great opportunity to not only try out a new sock knitting technique, but also to understand more how to convert patterns from one technique to the other. Each technique is color coded so it's easy to keep track while you are knitting up this pattern.


Jumble BIG framed

Thankyou again to Audrey for taking the beautiful photos for me.


3 Amelies BIG framed

Here is the pattern information for those of you interested in knitting up this pattern:

FINISHED MEASUREMENTS
Cuff Circumference: 11 inches stretched.
Foot Circumference: 7 inches unstretched
Leg Length: 6 inches (shorter version) 8 inches (longer version)
Foot Length: adjust to fit

MATERIALS
Version A (Burgundy Version): Regia Silk [55% Merino wool, 20% Silk, 25% Polyamide; 219yd/200m per 50g skein]; color: #032, 2 skeins
Version B (Blue Version); color: #053, 2 skeins
Version C (Green Version); color: #070, 2 skeins

DPN Method: #1 set of 5 US #1/2.25mm double pointed needles
2 Circulars Method: #2 24-inch US #1/2.25mm circular needles
Magic Loop method: #1 32-inch US #1/2.25mm circular needle

Regular closed ring stitch markers (2 circular or magic loop method only)
Safety pin or split ring stitch marker
Tapestry Needle

GAUGE
34 sts/52 rows = 4" in Stockinette stitch


I hope you enjoy knitting up your very own pair of Amelie socks!

(This pattern has been updated into a beautiful new pattern layout and format August 2010.)


7.18.2008

Pretty Pomatomus

Done!!!


These have been off the needles for a day or two now. I really raced through that second sock because I have a few other sock patterns that I desperately want to start.
I'm on a "knee-high sock kick" right now.


This pattern is the most complicated sock that I have knit to date. It isn't HARD, just one of the patterns where you have to pay attention every row. On the second sock, though I had chart A pretty much memorized and only had to look down occasionally to make sure that I was still on track.


My sister-in-law is making these same socks and when she finished her first, we both noticed how funny lookin the toe was. The pattern is written to include this ugly, pointy, squared off toe that really takes away from the beauty of the sock. I worked a standard rounded toe on my pair, and I think that it looks alot better.


This is what I did:

TOE:
Work decreases at stated in pattern until you have 64 stitches total.

Round 1: k all sts.
Round 2: Needle 1- k1, ssk, k to last 3 sts , k2tog, k1
Needle 2- k1, ssk, k to end
Needle 3- k to last 3 sts, k2tog, k1
(4 sts decreased)

Repeat these last 2 rounds until 32 sts remain. Then work just Round 2 until 12 sts remain. Slip sts from needle 2 onto needle 3, and graft the stitches together using kitchener stitch.


I really am obsessed with how cute handknit socks look with a good pair of Mary Janes. I want to extend my sock wardrobe to have a different color sock for every outfit.

7.12.2008

Pomatomus Progress

One down! One to go!


This sock pattern is apparently not for the faint of heart because several knitters in the Pomatomus Sock knit-a-long have dropped out!
It is a time consuming pattern, but oh so worth it!
That being said, I still took precautions and cast on for sock #2 right away
to prevent a serious case of
"second sock syndrome" from setting in.

sooooo pretty...

7.09.2008

More Dolls...

To my dearest blog readers,

(All 3 of you out there...)

I know... I know... you are probably so sick of seeing pictures of dollies.. But please bear with me. These were just too cute. I had to share.

For all of you who feel that if you see one more dolly picture you might just throw up.....well... now is the time to go get yourself a bucket.

These pictures are from when Ava gave her cousin Audrey her dolly as a special present.


Ok, thats it... I promise I'm done.


So now that I've gotten all of that "doll knitting" out of my system, there are some exciting things coming up here!
I have some projects that are soon crossing the finish line,
as well as some super huge, complicated, scary sweaters
that I will be starting very soon.
Stay Tuned.

7.05.2008

Birth Announcement


ITS A GIRL!!!

It is our pleasure to announce that on July 2, 2008 at 11:13 pm a beautiful healthy baby was born to Ava's Dolly.

Weighing .3 oz, and measuring 5 inches


After a few days in the hospital, Ava's Doll is so happy to be home enjoying her new baby...


I decided to make a baby for the doll because my daughter is obsessed with playing "babies" right now. She is always walking around rocking her dolls and giving them bottles. She has been have a blast pretending with this little baby too.


To make the baby:
(I made up this pattern based on the adult size doll pattern out of the book "Knitted Babes")
Use size 2 needles and a small amount of dk weight yarn. (The book calls for a fingering weight but I found the perfect flesh color in a dk and also it knits up to a tighter firmer fabric so that no stuffing shows through.)
BODY:
(Make 2)
Cast on 12 sts, purl first row. Work 19 rows total in stockinette stitch.
ssk, k to last 2 sts, k2 tog (10 sts)
p2tog, p to last 2 sts, p2tog (8 sts)
mark first and last sts for underarm placement with safety pins.
ssk, k to last 2 sts, k2 tog (6 sts)
purl 1 row
kfb, k to last st, kfb (8 sts)
purl 1 row
repeat last 2 rows until there are 16 sts.
work 5 rows in stockinette stitch
k2tog across row (8 sts)
purl 1 row
k2tog across row (4 sts)
bind off purlwise, leave a long tail for sewing up the doll.
Arms:
(Make 2)
Cast on 3 sts, work a 3 st I-cord for 13 rows, bind off.
Legs:
(Make 2)
Cast on 4 sts, work a 4 st I-cord for 15 rows, bind off.
I embroidered her face as directed in the Knitted Babes book using tiny pieces of felt. I cut the felt eyes and lips to a smaller scale to fit the baby's face.
I made the bellybutton with a french knot using the same flesh toned yarn.
I seamed the doll with a darning needle and yarn tails, carefully placing arms and legs as I went.
Dont forget to stuff your doll at the same time!!! The book recommends doll stuffing, but I used small bits of wool roving. I think that it gives it a more natural feel.
(Oh yea...Dont completely sew up the head before you stuff it, that neck is so tiny, its impossible to stuff the head through that small opening!)
I added hair as directed in the book using a crochet hook. I did it the same way you would add fringe to a scarf then clipped the hair to a desired length.
Weave in your ends!

To make the diaper:

Use fingering weight yarn and size 2 needles.
cast on 15 sts
purl first row
knit 1 row
purl 1 row
decrease row- ssk, knit to last 2 sts, k2tog (13 sts)
repeat last 2 rows once more
work only decrease row one more time (9 sts)
p2tog, p to last st, p2tog (7 sts)
knit 1 row
purl 1 row
knit 1 row
pfb, p to last st, pfb (9 sts)
increase row-kfb k to last st, kfb (11 sts)
purl 1 row
repeat last 2 rows once more (13 sts)
(to make the diaper tabs)
work increase row again and cast on 3 sts at end of row using backwards loop cast on (18 sts)
purl across row, casting on 3 sts at end of row using backwards loop cast on. (21 sts)
knit 1 row
purl 1 row
bind off knitwise.
Try the diaper on the baby, fold tabs from the back of the diaper to overlap the diaper front. Adjust to fit your baby, pin into place. Remove diaper from the doll and stitch down diaper tabs to diaper front.
Weave in ends.

To make the blanket:

Use size 3 needles and fingering weight yarn.
Cast on 45 sts
(basketweave pattern)
1- k3, p3, repeat across row
2- p3, k3, repeat across row
3- k3, p3, repeat across row
4- k3, p3, repeat across row
5- p3, k3 repeat across row
6- k3, p3, repeat across row
repeat the last 6 rows, 8 times more
cast off sts in set ribbed pattern
With a contrasting color, sc around blanket, working one sc for every stitch on the blanket bottom and top, and 2 sc for every 3 rows on the blanket sides. Work 2 sc in each corner.
Work one more complete round of sc around blanket.
Shell border: *ch1, sk 1 sc, (2 dc, ch1, 2 dc) in next sc. ch 1, sk 1 sc, sc in next sc
repeat from * around entire blanket.
Weave in ends.


The doll will now be so happy to have a fresh diaper and a warm cozy blanket.


Dolly is getting used to being a mommy and is getting a lot of practice changing diapers...


She is also sleeping when the baby sleeps....

7.01.2008

Big news!

Ava's dolly is expecting a baby!


Don't ask me how it happened....


It has all happened so fast but she is already in her third trimester and is due to give birth any day!


Ava is very very excited about this...